Managing Users
View user details and delete management user accounts
Overview
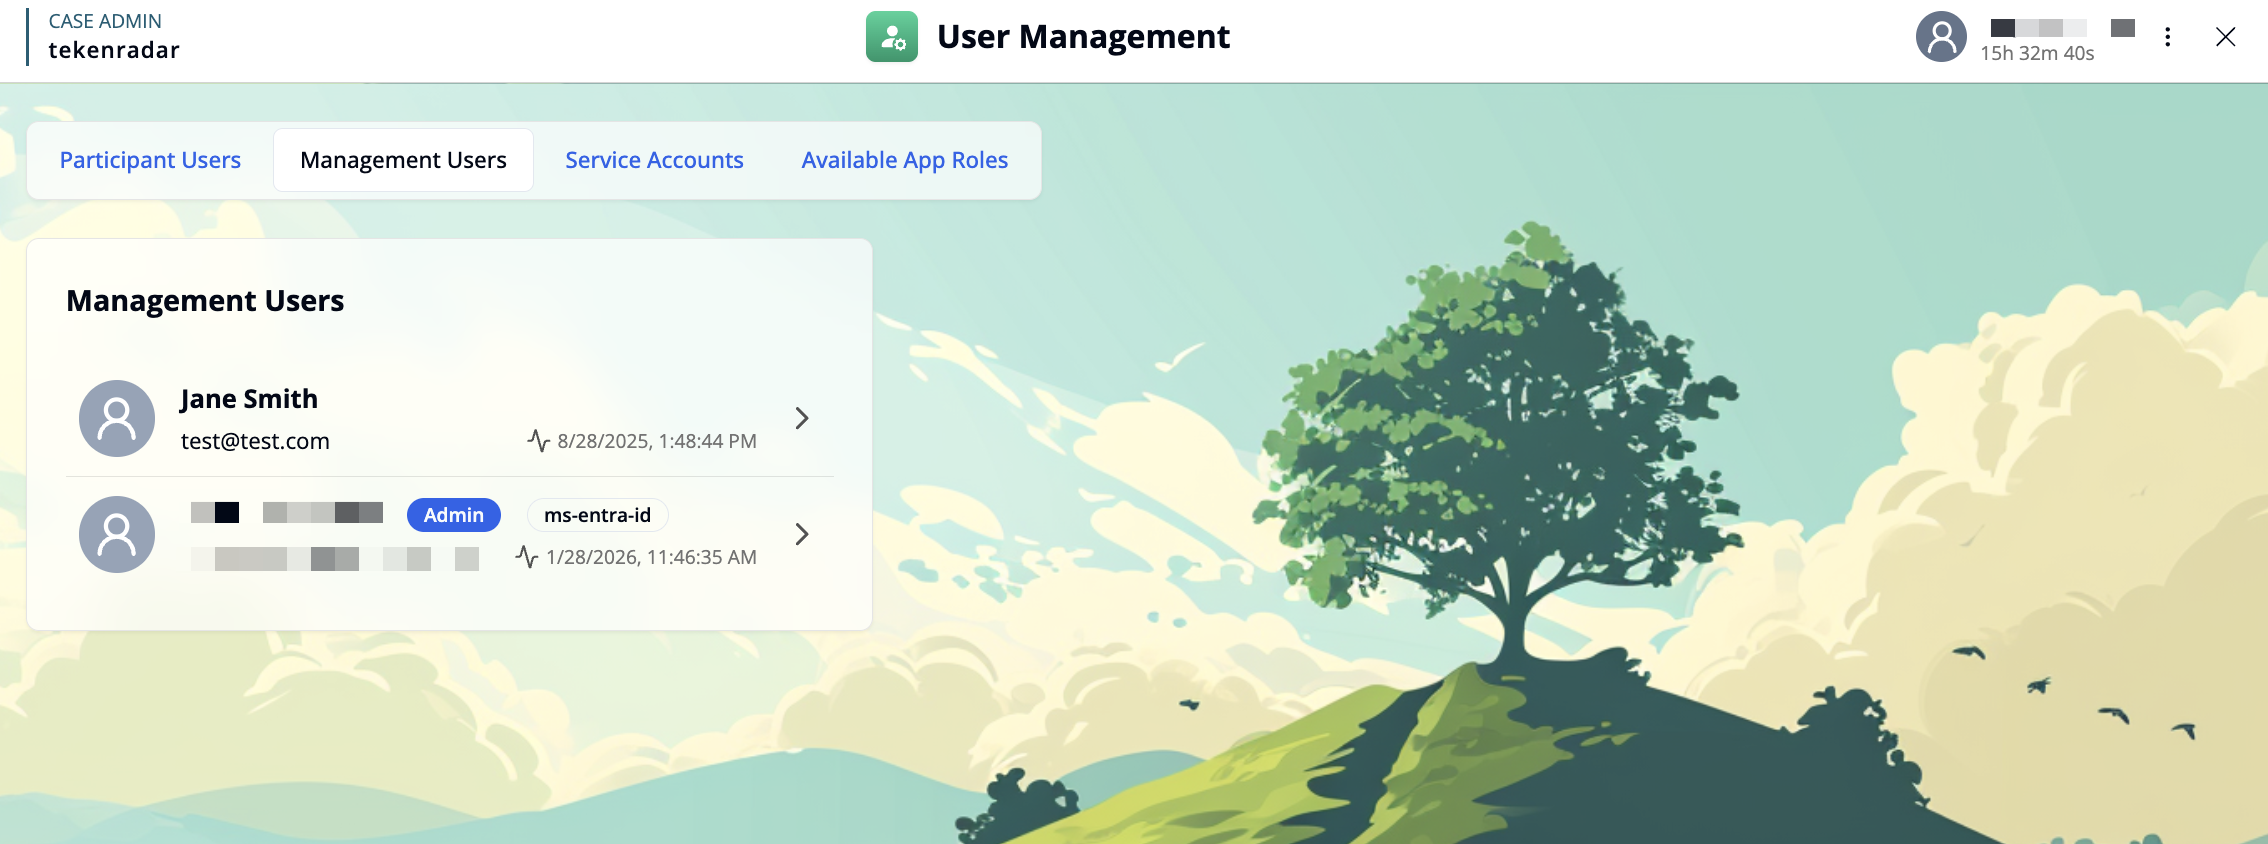
The "Management Users" tab displays all management user accounts in the system. Each user entry shows:
- Profile icon: A placeholder avatar for the user
- Name: The full name of the user
- Email address: The user's email address
- Role: The user's role in the main system (e.g., "Admin") and optional additional identifiers (e.g., "ms-entra-id")
- Last login: The last login time
- Arrow button: Click to view and manage user details
Click on a user card to access detailed settings for that user.
User Details
When you select a user, you can view and manage their account information.
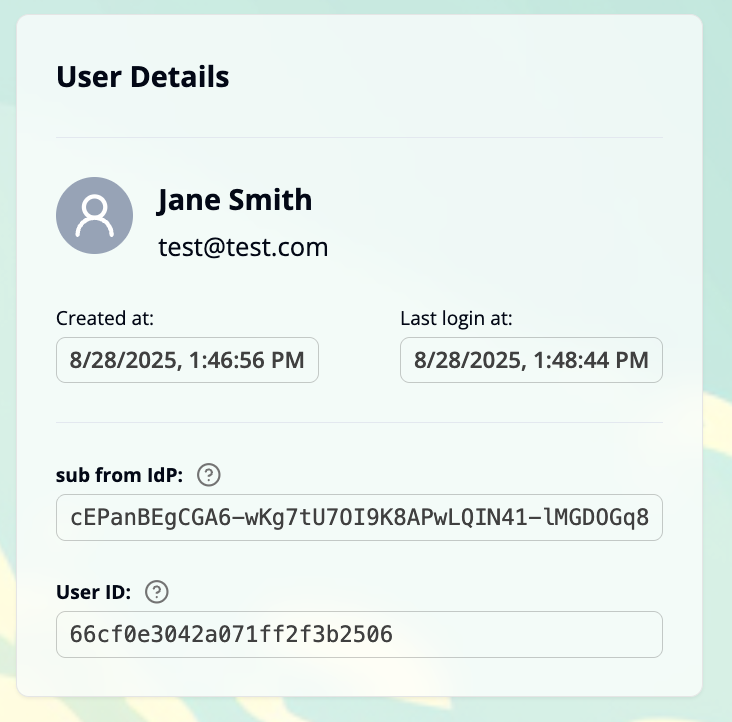
User Information
The User Details section displays:
- Profile icon and name: The user's avatar and full name
- Email address: The registered email address
- Created at: Timestamp when the user account was created
- Last login at: Timestamp of the user's most recent login
- sub from IdP: The unique subject identifier received from the Identity Provider
- User ID: The unique internal identifier for this user in the application
Managing App Roles
You can assign app roles to this user to grant them specific sets of permissions. For detailed instructions, see Assigning Roles.
Managing Permissions
Permissions define which actions the user is allowed to perform in the system.
The Permissions section displays all permissions granted to this user in a table format:
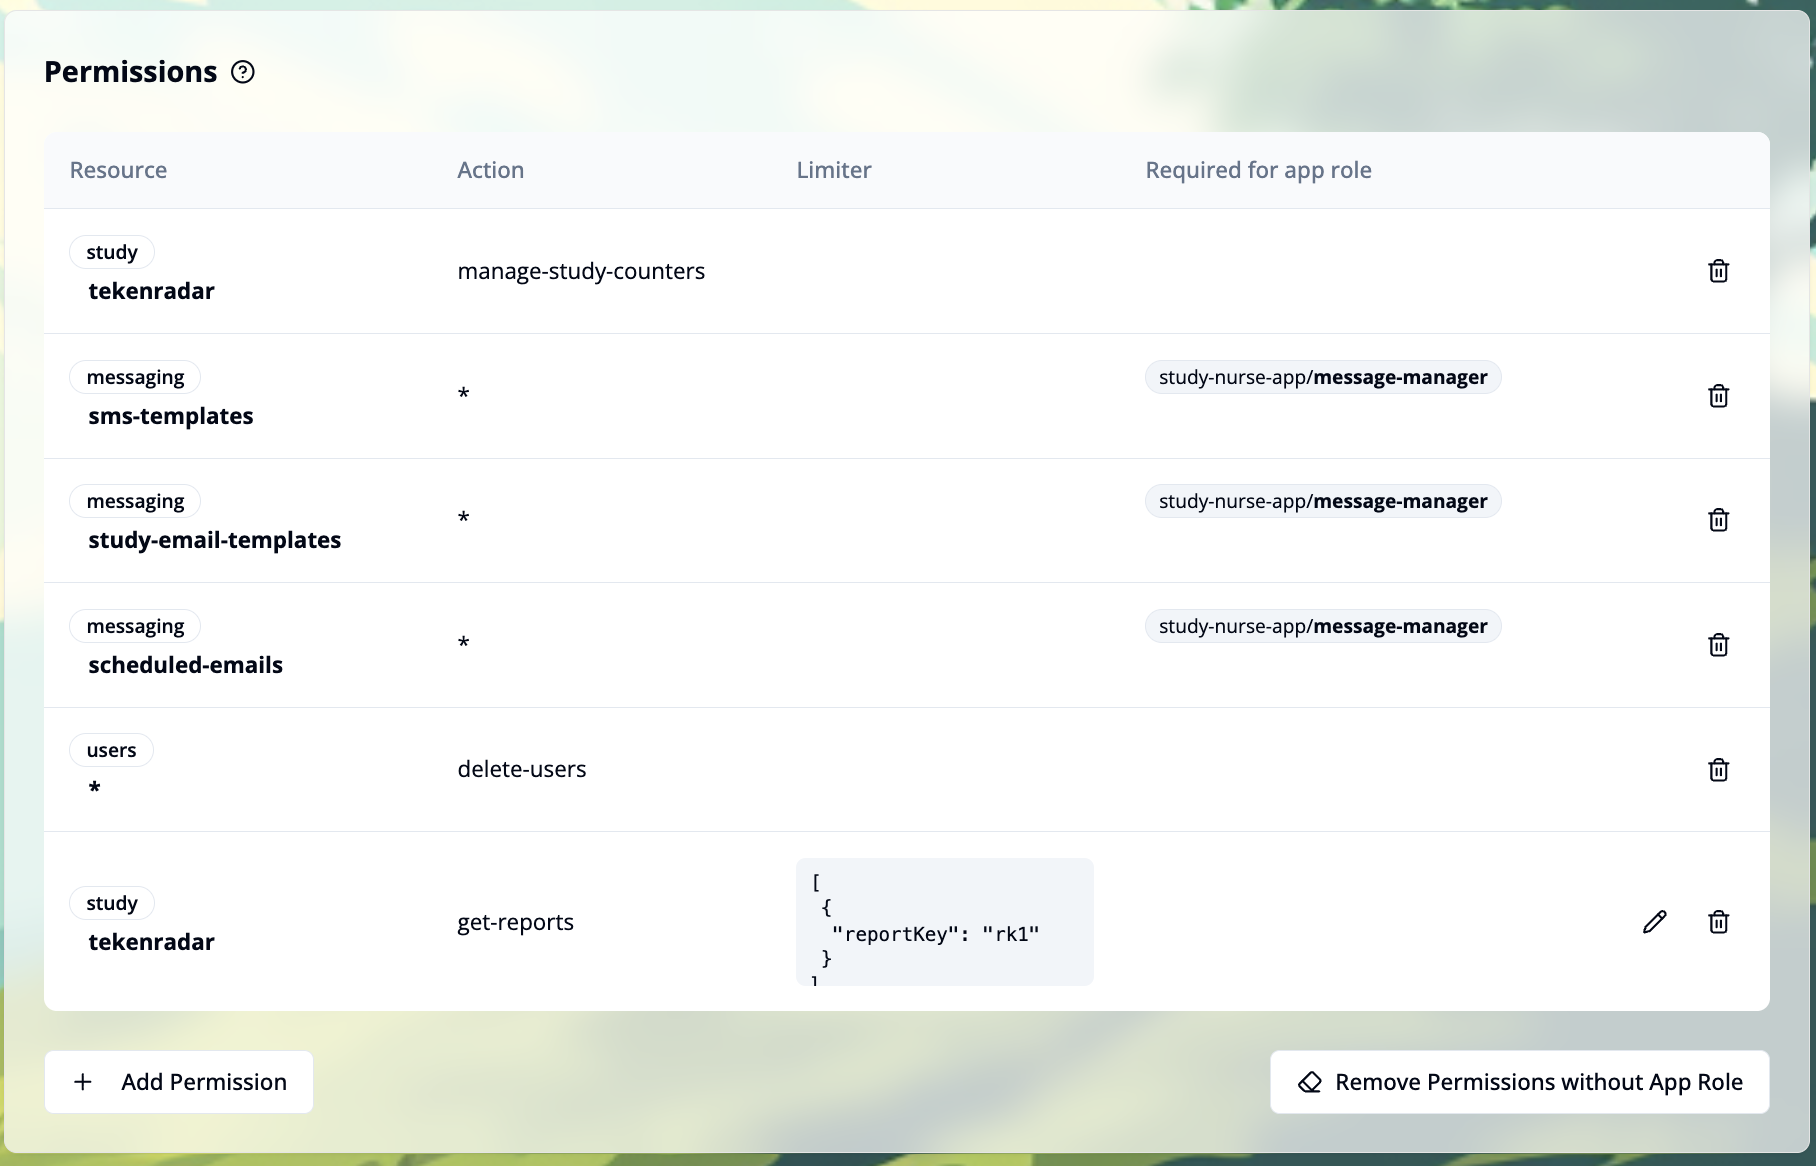
Each permission entry shows:
- Resource: The resource type and identifier (e.g.,
study tekenradar,messaging sms-templates) - Action: The action the user can perform (e.g.,
manage-study-counters,delete-users). An asterisk (*) indicates all actions are allowed - Limiter: Additional constraints in JSON format that restrict the permission to specific conditions (e.g.,
{"reportKey": "rk1"}). Click the pencil icon to edit the limiter - Required for app role: Shows which app role (if any) requires this permission (e.g.,
study-nurse-app/message-manager) - Delete button: Click the trash icon to remove this permission
Adding Permissions
Click the + Add Permission button to grant the user access to specific actions or resources.
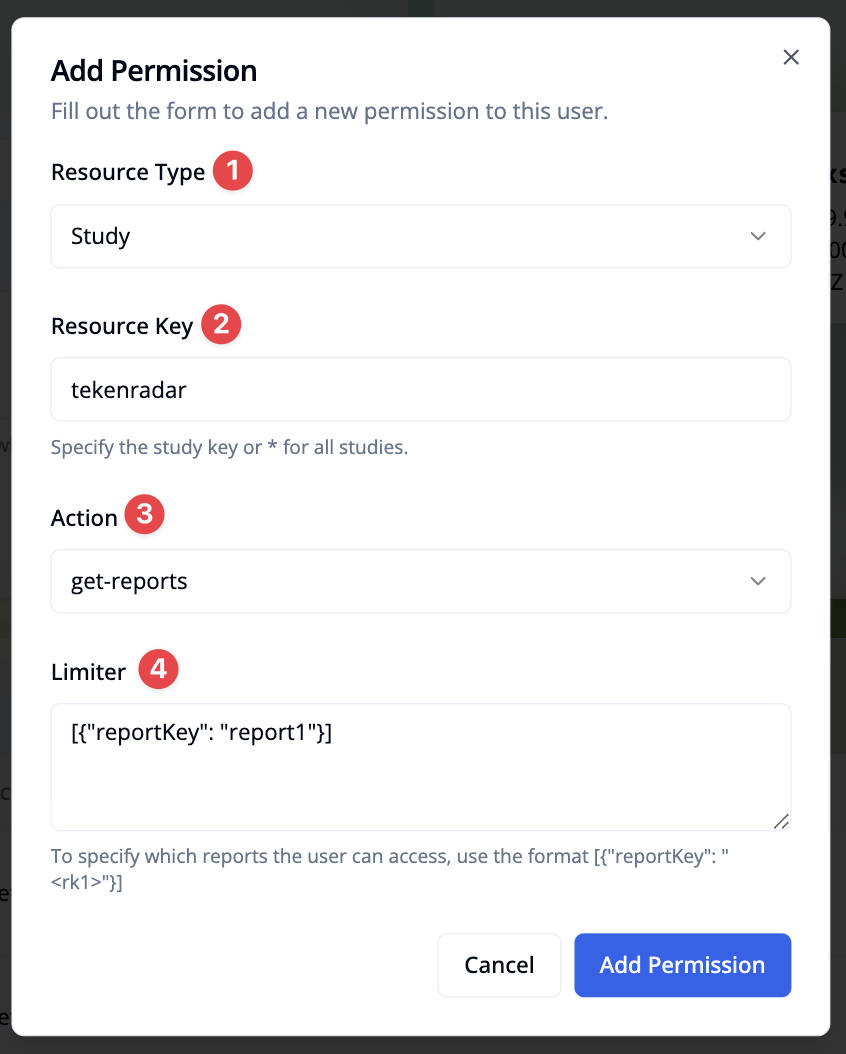
In the permission dialog, you can configure:
Resource Type: Select the type of resource. Options are: Study, Messaging, or Participant Users.
Resource Key: Specify the resource identifier depending on the resource type:
- For Study: Enter a study key (e.g., "tekenradar") or use "*" for all studies
- For Messaging: Select a resource ID from:
global-email-templates,study-email-templates,scheduled-emails, orsms-templates - For Participant Users: Only
*is available (applies to all participant users)
Action: Select the action the user is allowed to perform (e.g., get-reports)
Limiter (available for specific actions): Define additional constraints in JSON format. For example, to limit access to specific reports, use the format [{"reportKey": "report1"}]
After configuring the permission, click Add Permission to grant it to the user.
Deleting Permissions
To remove a single permission, click the trash icon at the end of the permission row in the permissions table.
If you need to remove multiple permissions that were added through an app role, use the Remove Permissions without App Role button at the bottom of the Permissions section. For more information, see Assigning Roles.
Review permissions regularly and remove any that are no longer needed to maintain security.
Delete User
If a management user account is no longer needed, you can permanently delete it from the system. To access the delete option, scroll down to the bottom of the page.
Deleting a user will remove all their permissions and sessions from the system. To actually revoke full access to the system, you need to remove access through the Identity Provider.
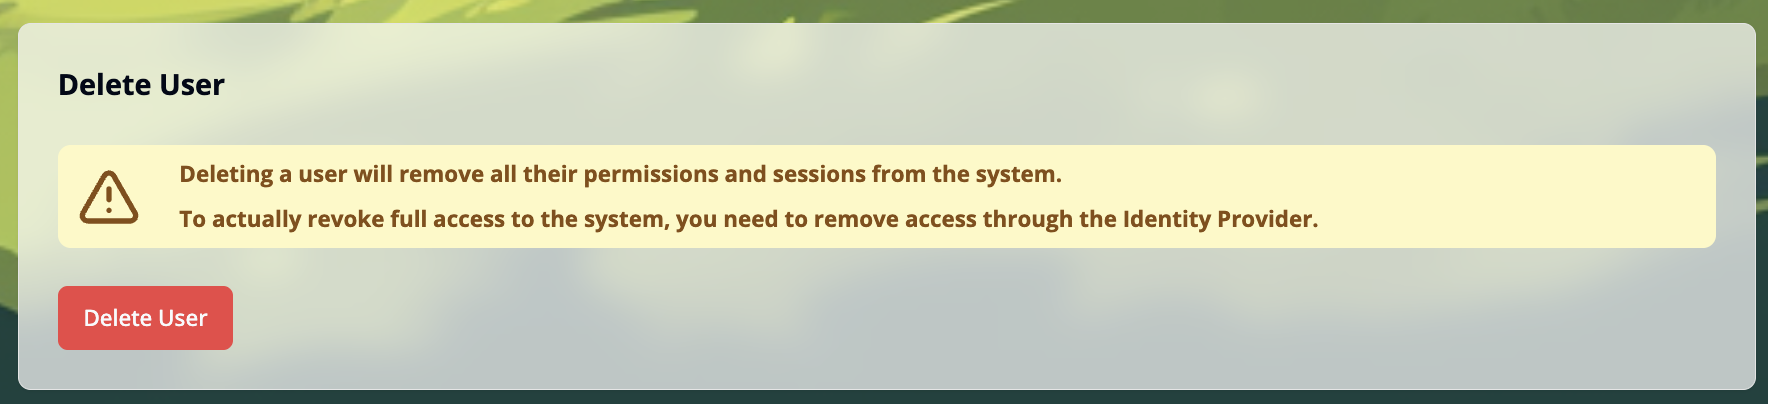
Click the red Delete User button to permanently remove the user account. This action cannot be undone.