Build a Conditional Contact Form with Consent
A step-by-step example using conditional logic.
This guide shows you how to create more advanced question flows using conditions. We'll use a consent question as an example, followed by a contact form that only becomes visible when consent is given.
First: Build Consent Question
Click the plus icon in the left toolbar or the "Add a new item" button in the "Items" tab.
Select the option "Question or Info item".
Select the option "Consent". The consent item is now shown in your item list. Click on the item to see the content item interface.
Select the component you would like to edit by clicking on it (Read more about item components).
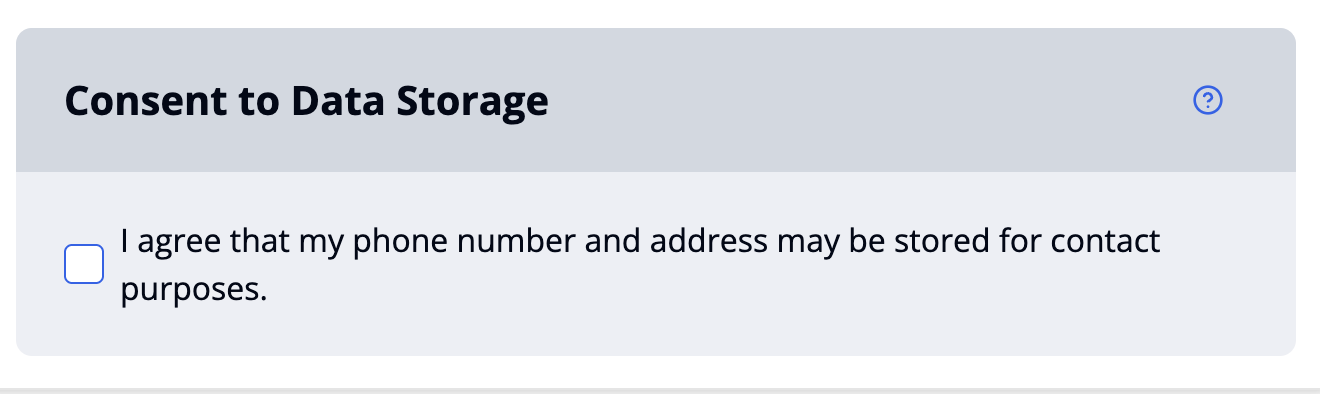
Write your title text e.g. "Consent to Data Storage" in the text field of the title component. Go back to consent item interface.
Click on "Response options" and write the consent text in the label text field e.g. "I agree that my phone number may be stored for contact purposes". Your item now looks like this:
Clicking on the label text during the survey will open a detailed consent dialog. Write the title of the dialog in "Dialog title", e.g. "Can We Store Your Contact Details?".
Enter the dialog content in the “Content” field. You can also format your text or add bullet points:
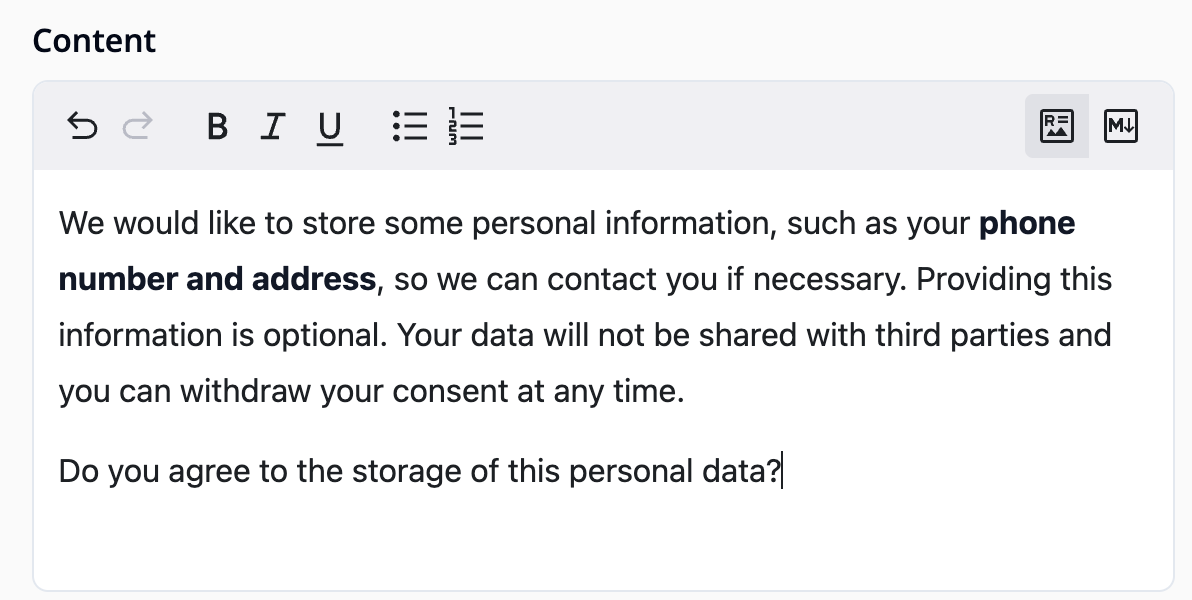
The dialog includes two buttons: Reject and Accept. You can customize their labels by editing the fields labeled "Accept button" and "Reject button".
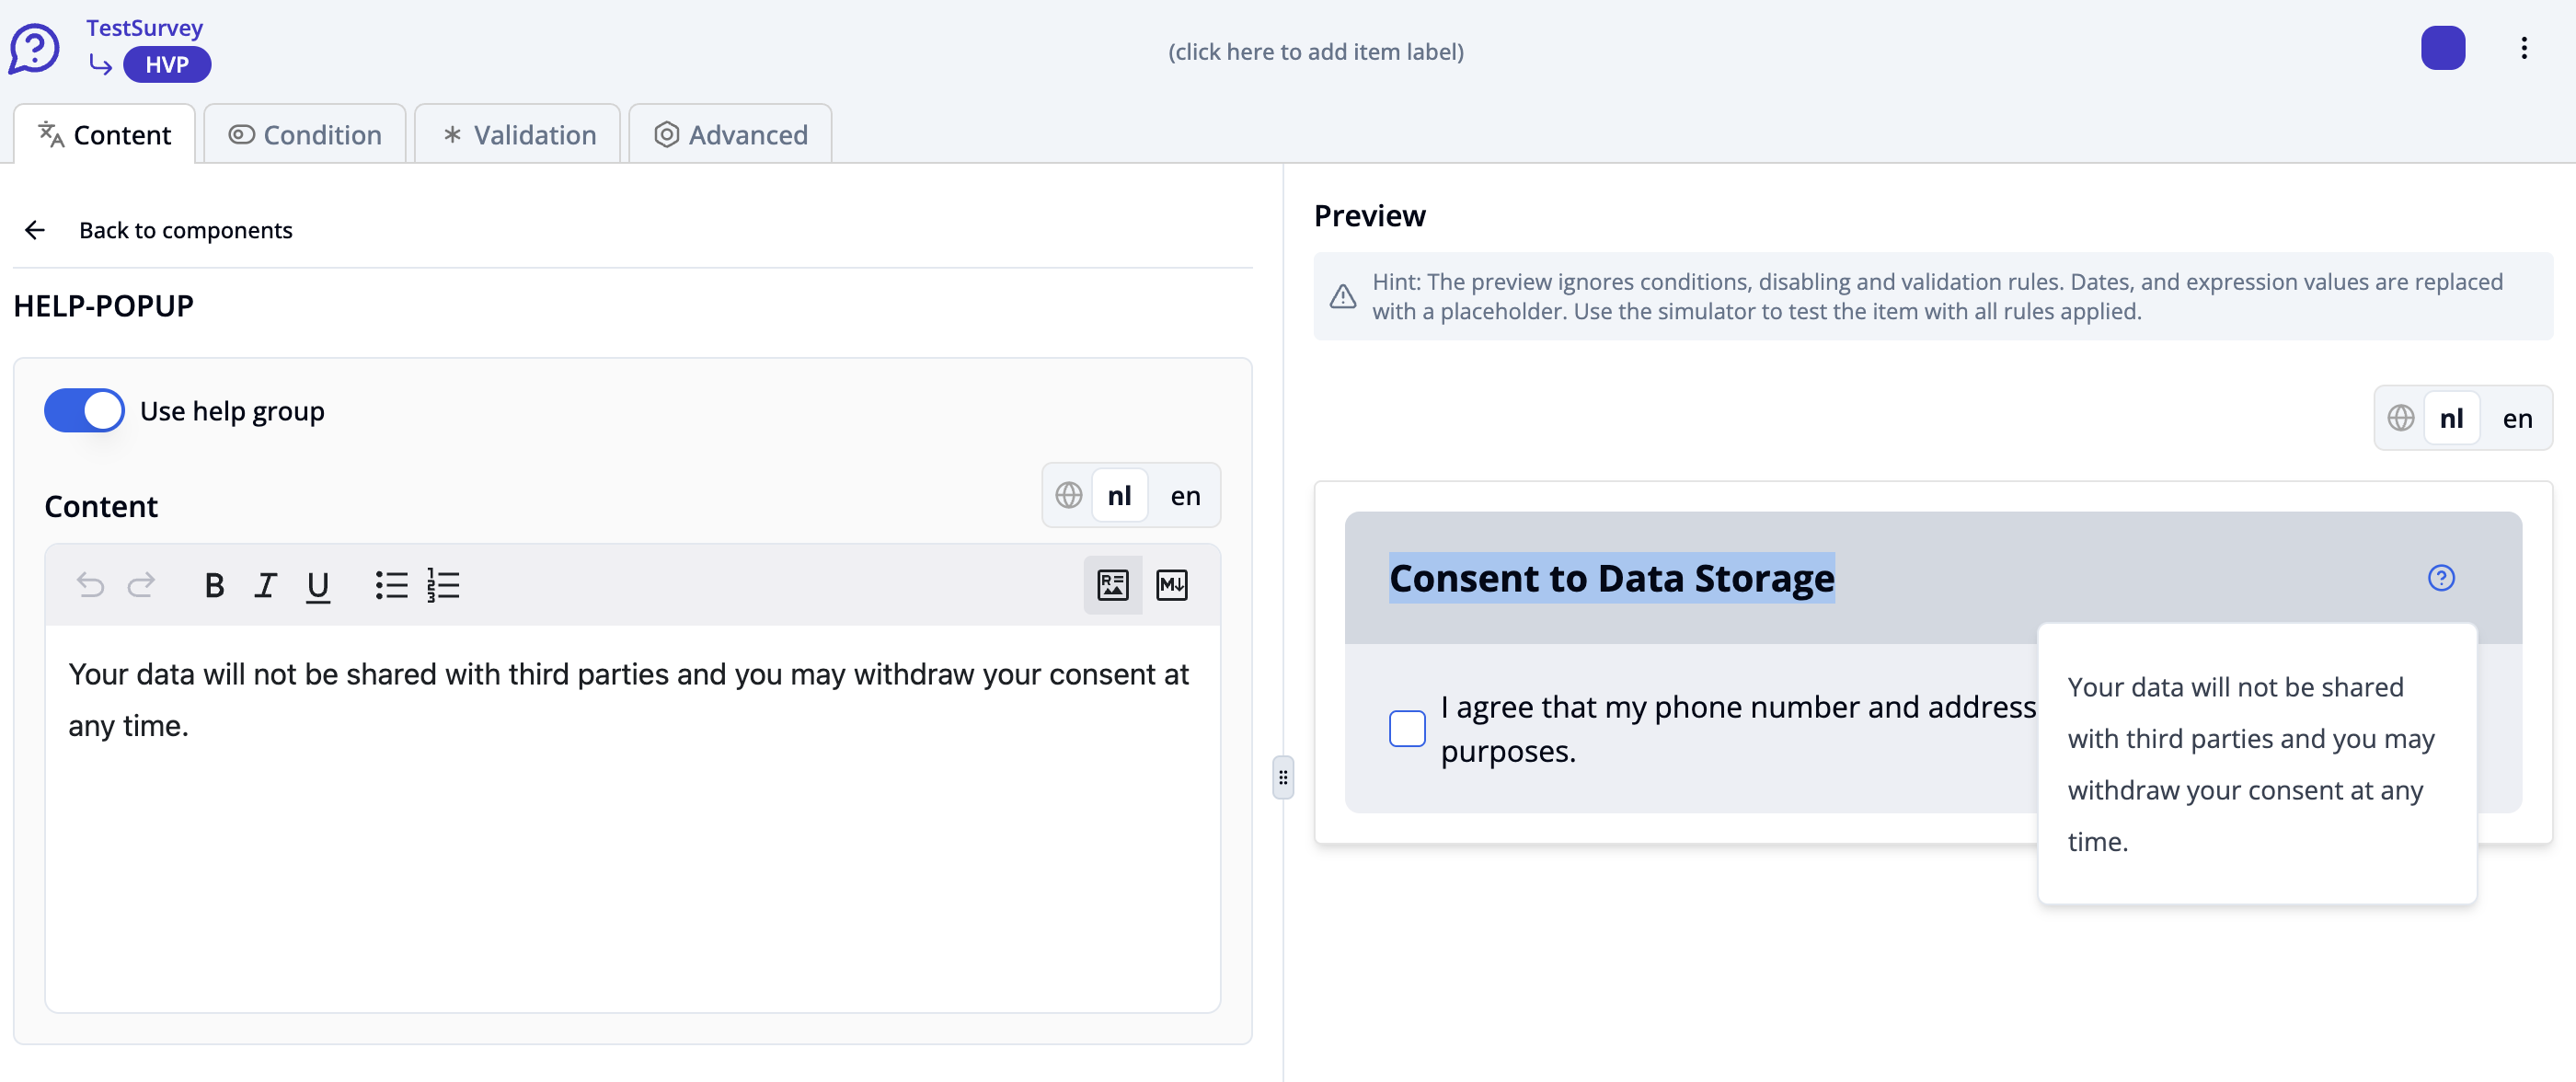
Go back and click on the Help/Info popup.
Toggle the switch "Use help group" and add additional info text in the content field:
 You’ve successfully configured the consent item. It’s now ready for use.
Second: Build Contact Form
Add a contact form item by clicking the plus icon at the bottom of the question list on the left-hand side.
Choose "Question or Info Item" and then "Contact Form Question". This will display the contact item configuration interface.
Write your title text e.g. "Contact data" in the text field of the title component.
Click on "Response options".
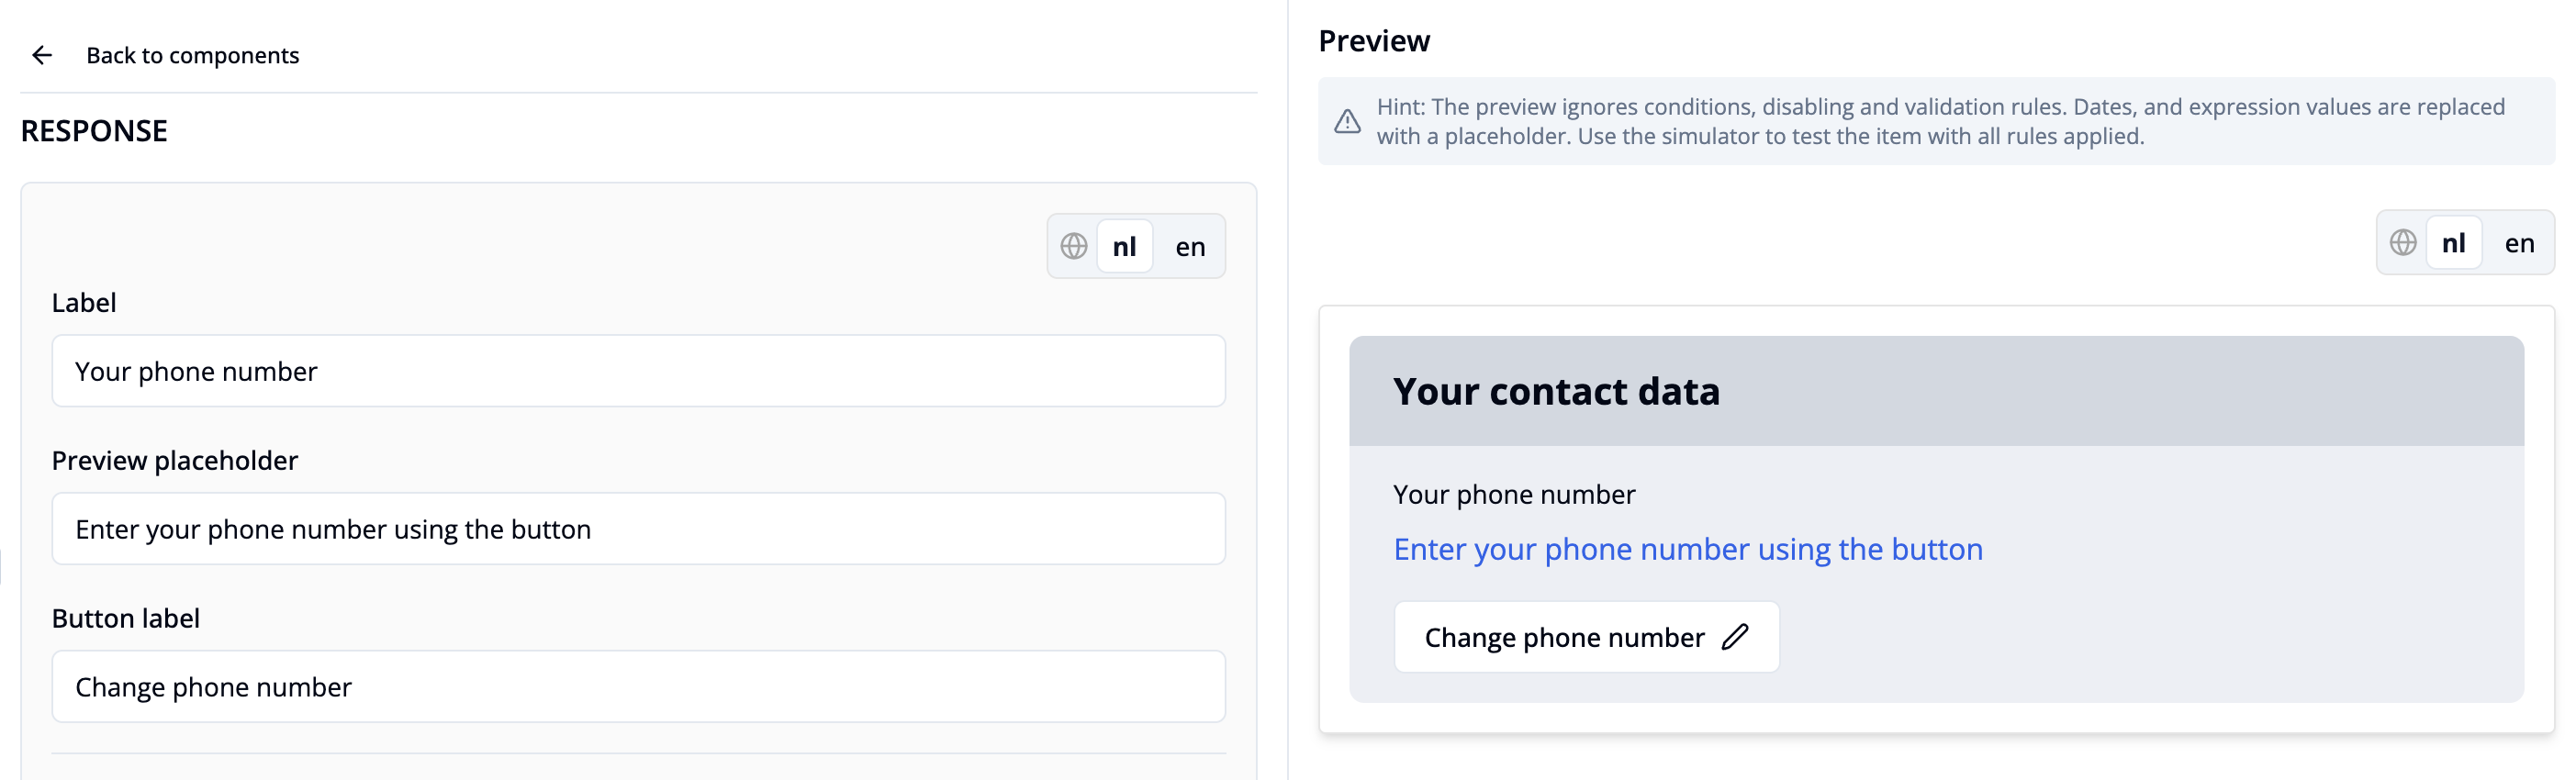
Briefly describe in the label field what the user is expected to enter, e.g. "Your phone number".
Write your text in the preview placeholder field e.g.: "Enter your phone number using the button.". This helps guide the user before they open the dialog.
Edit the label on the button the user clicks to open the contact form dialog, e.g."Change phone number".
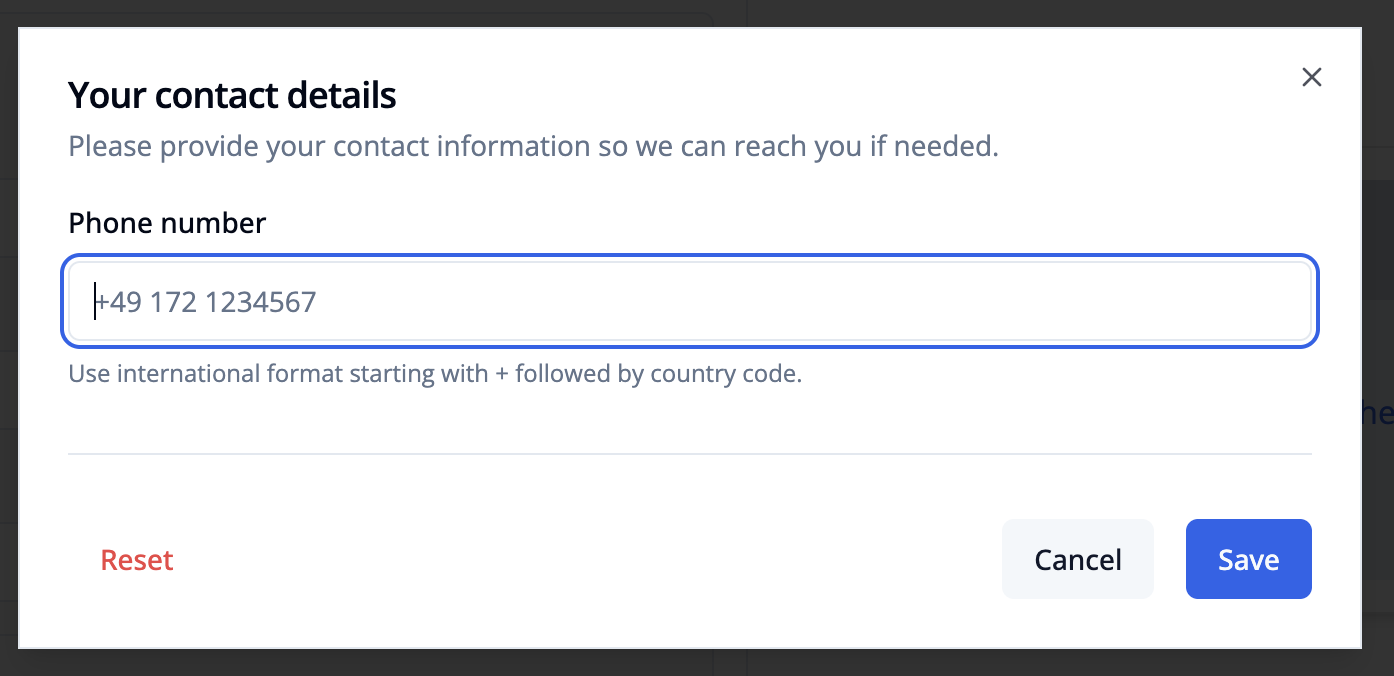
Enter the title that appears at the top of the popup dialog where the user enters their information, e.g. "Your Contact details".
Provide context inside the dialog description field, e.g., why you're asking for contact details: "Please provide your contact information so we can reach you if needed."
Customize the Cancel, Reset, and Save button labels as needed.
Toggle the switch “Use field” next to "Phone" to add the phone number field to your contact dialog.
Enter the text in the label field that will appear above the phone input e.g. "Phone number"
Enter a placeholder text that will appear inside the input box before the user types anything "e.g. +49 172 1234567".
Add a regular expression to define the required input format e.g. (international format): ^\+\d{1,4}\s?\d{3,}$
Provide an optional hint text shown below the input field to give the user more guidance e.g. "Use international format starting with + followed by country code.".
Enter the error message that should be displayed if the input does not match the pattern e.g.
"Please enter a valid phone number in international format.". The editor and preview of the final dialog are shown below.

To add other fields like Address, Full Name, Email, or Company Name, simply toggle the corresponding switch and configure the settings as needed.
Go to the "Condition" tab to define conditional logic for the question. The contact form should only be shown if consent to store contact data is given.
Click “+ add value”.
In the dropdown menu, scroll to the Templates section and select “Consent question accepted”.
Enter the item key of the consent question. Tip: You can find the key by hovering over the question icon in the left sidebar.
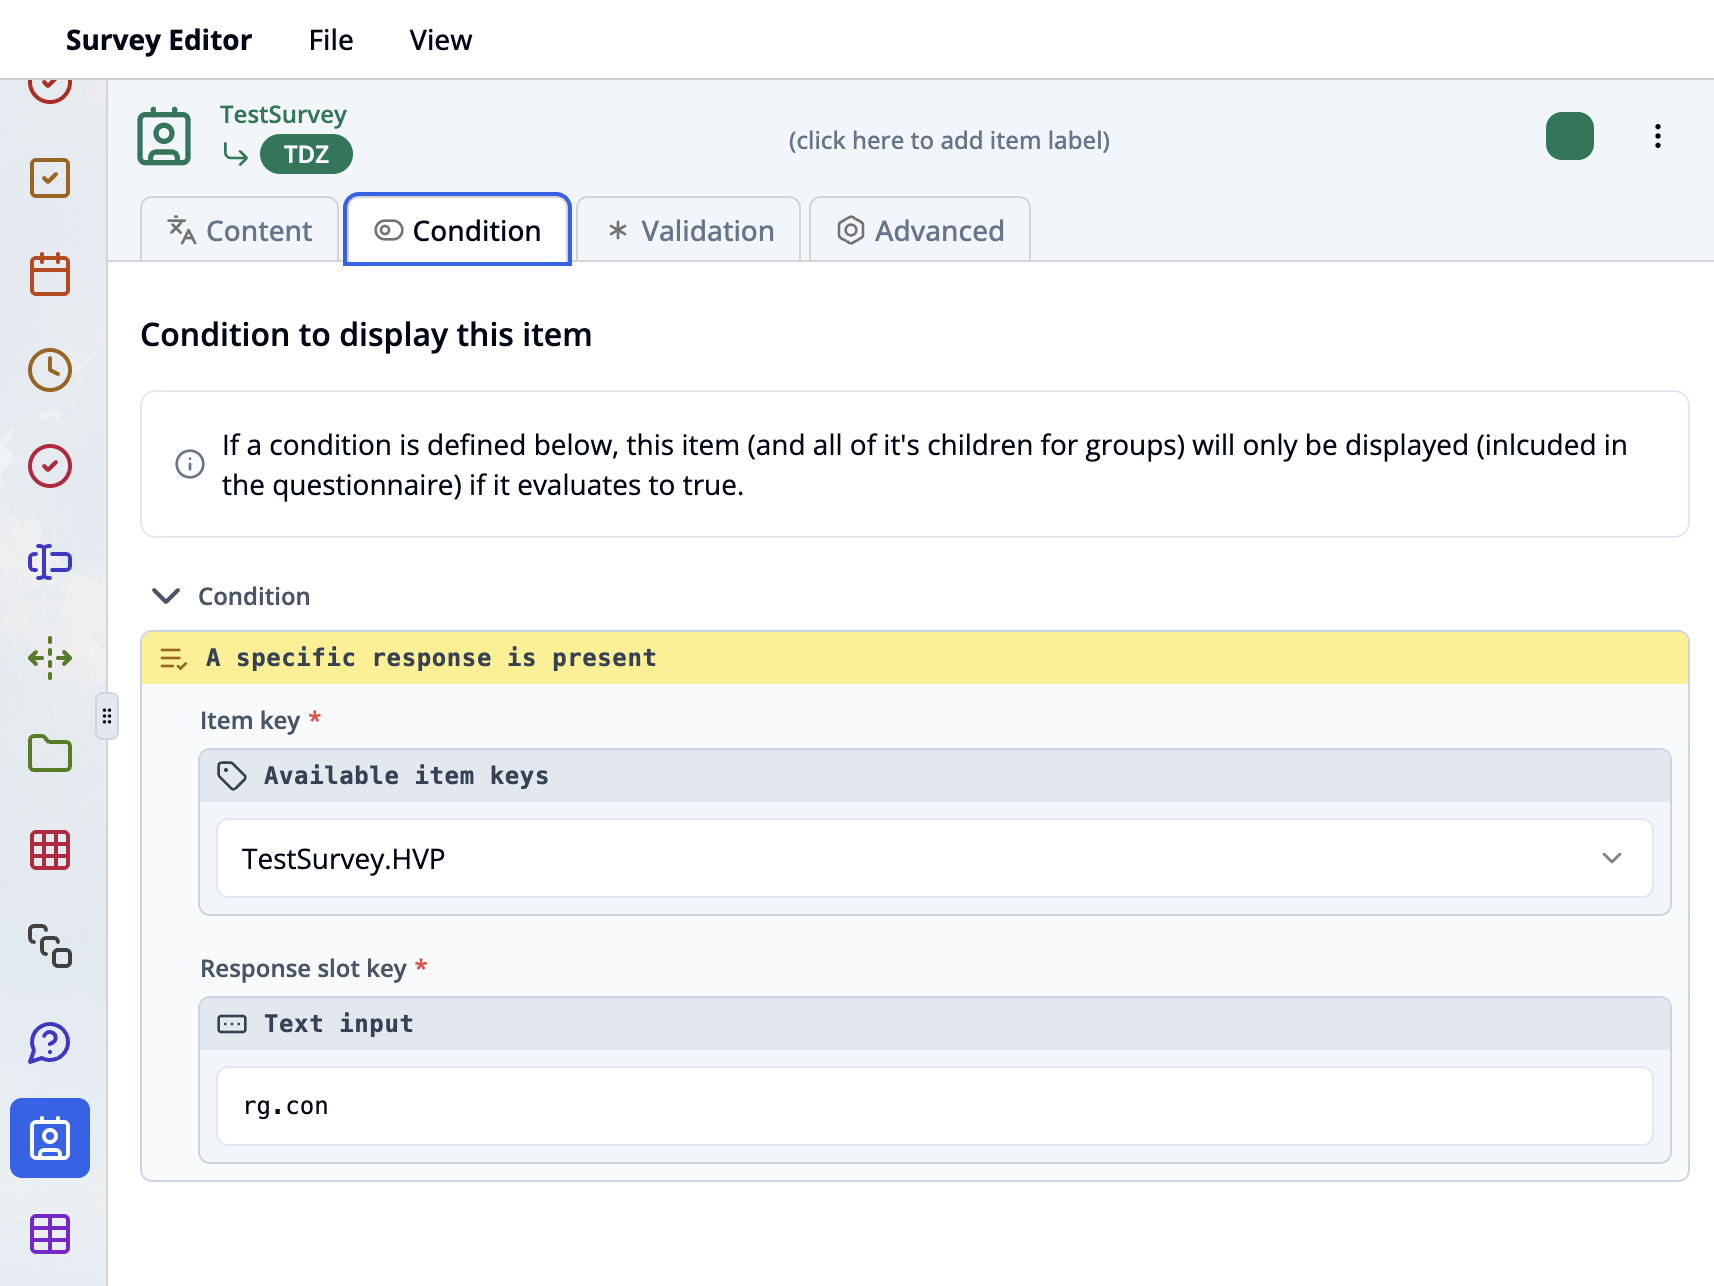
A response slot key is not required. Use the survey simulator to verify that the conditional logic works as expected.