Participants
View and manage participant accounts and profiles
Overview
The "Participant Management" module allows you to view, filter, and manage all participant data across your studies. The "Participants" tab provides a comprehensive view of all participant accounts in your study. You can filter, sort, and export participant data, as well as access detailed information about each participant.
Accessing the Participants List
Navigate to the "Participant Management" module
Choose a study from the list of available studies (e.g., "tekenradar")
Select the "Participants" tab from the sidebar
The participants overview for the selected study will be displayed
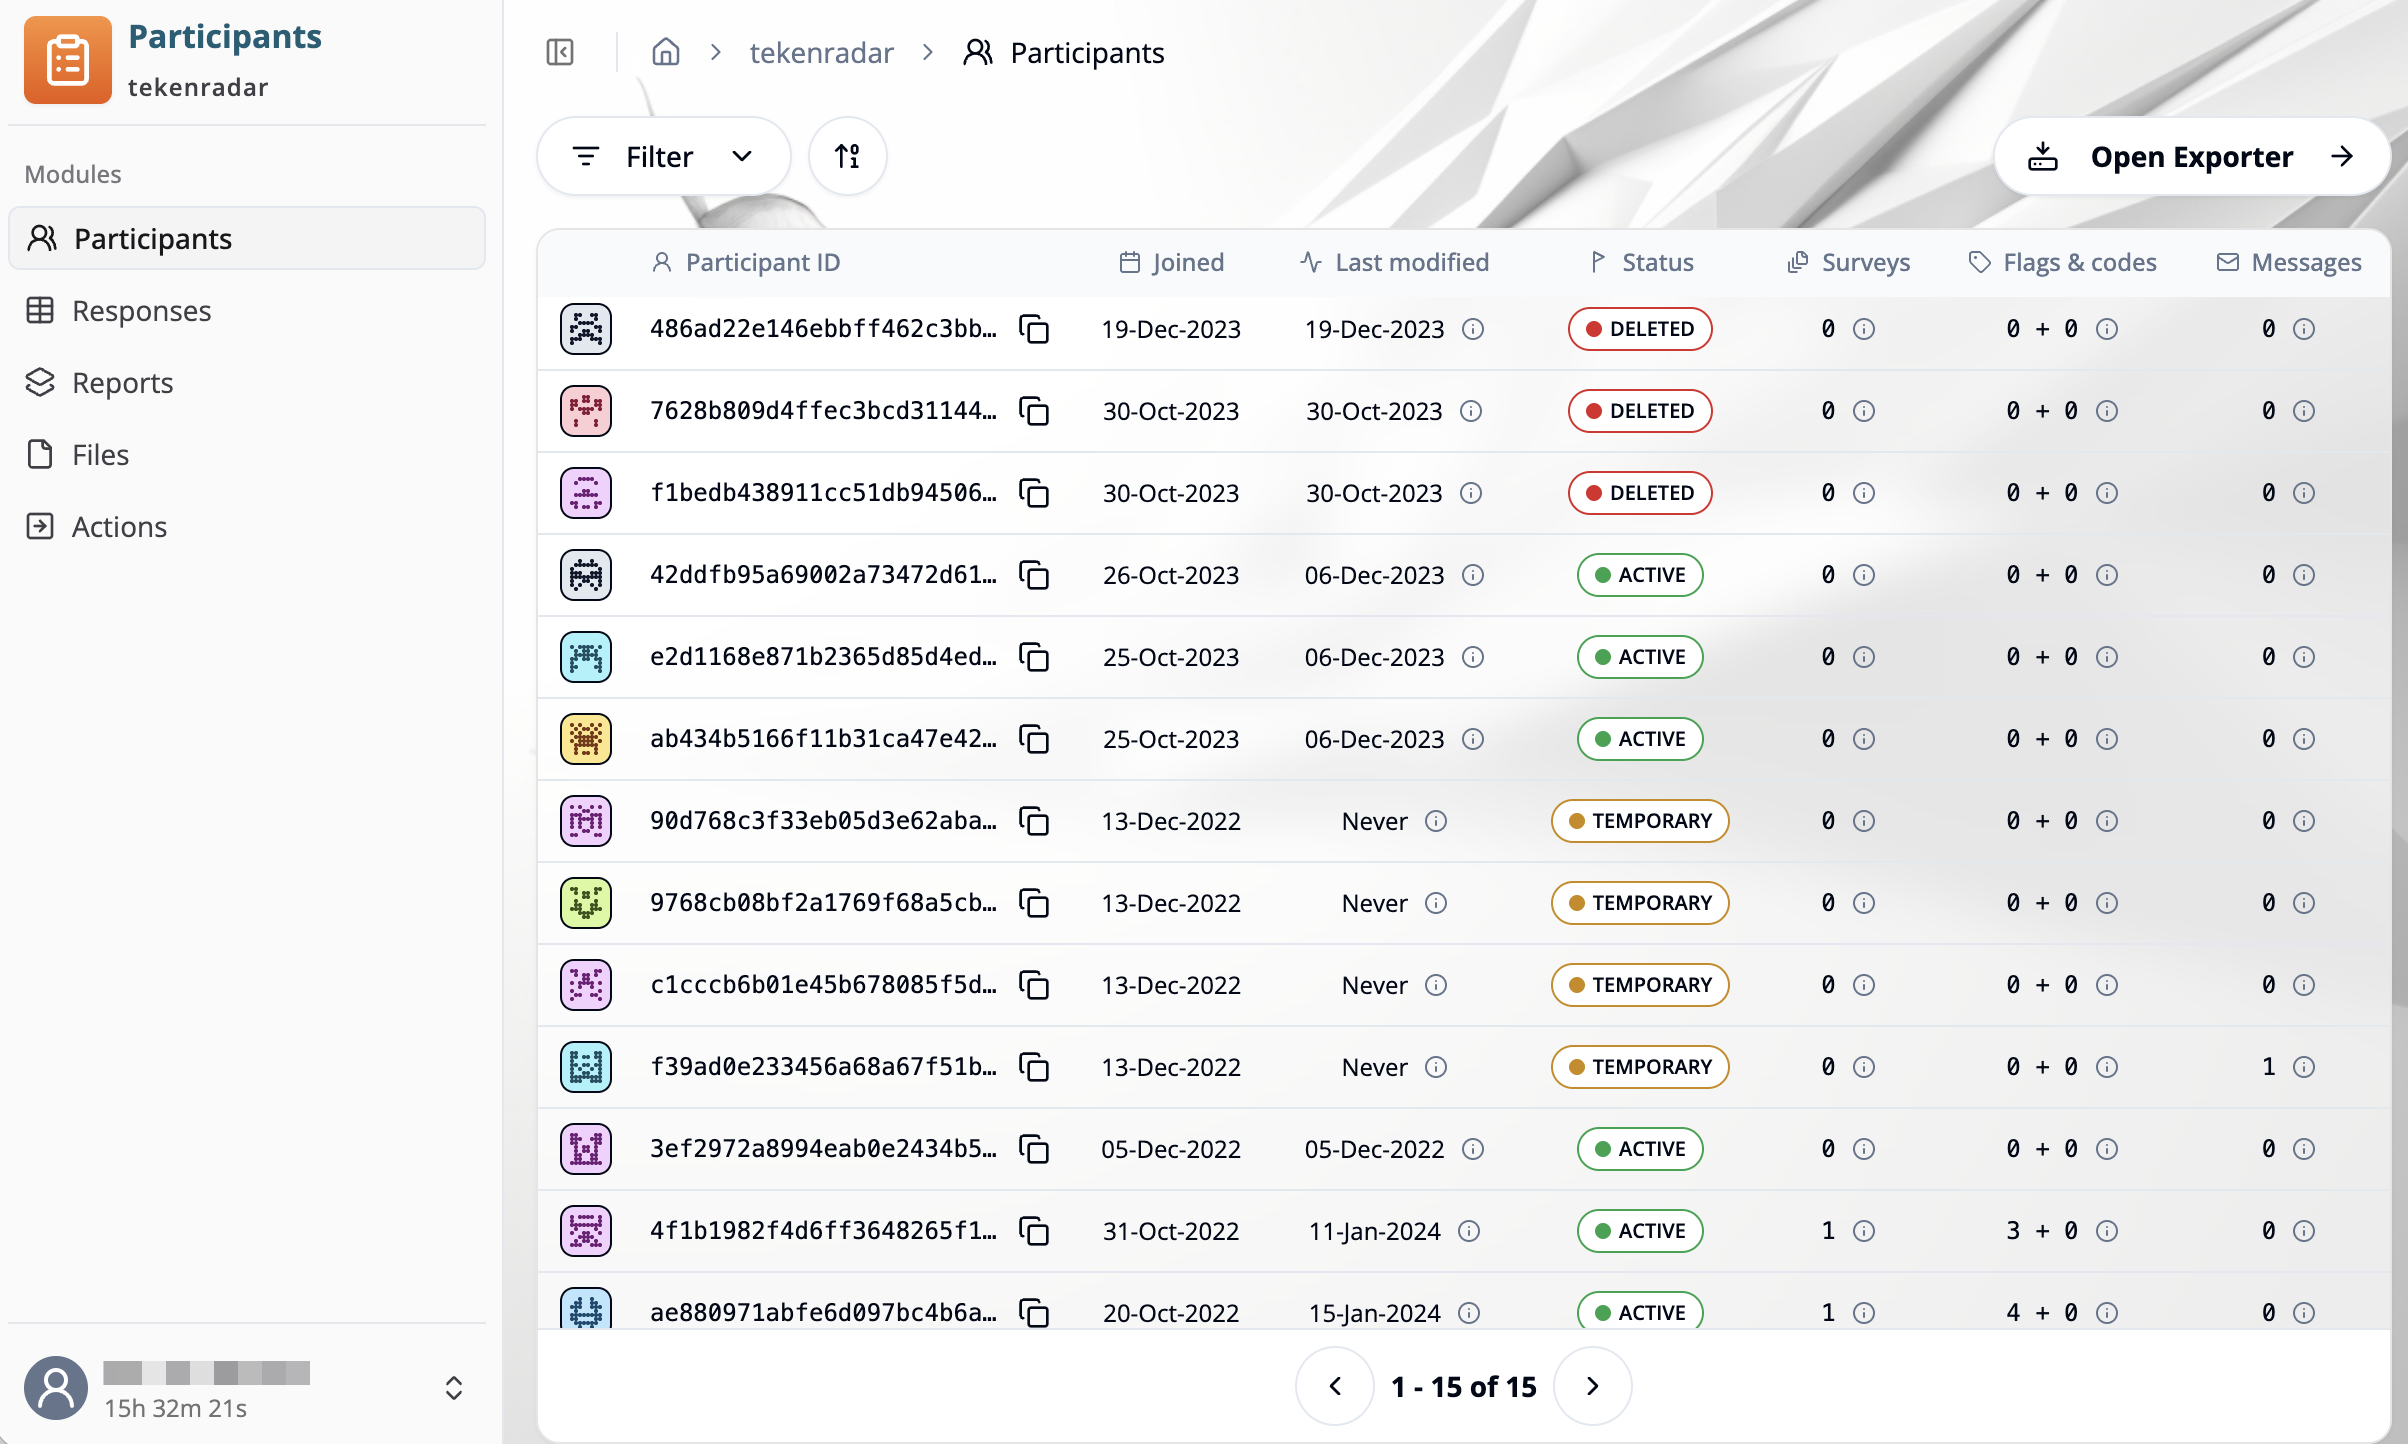
Participants Table
The participants table displays the following information for each participant:
Participant ID
- Icon: A unique avatar icon for visual identification
- ID: The participant's unique identifier (e.g.,
486ad22e146ebbff462c3bb...) - Copy button: Click the copy icon to copy the participant ID to your clipboard
Joined
The date when the participant first joined the study (e.g., 19-Dec-2023)
Last modified
The date when the participant's data was last updated, typically when they submitted a survey. Hover over the info icon for additional details.
Status
Indicates the current state of the participant account:
● ACTIVE: Participant is actively enrolled in the study
● DELETED: Participant account has been removed
● TEMPORARY: Temporary or virtual participant account (e.g., created before full registration)
● VIRTUAL: Virtual participant account
● OTHER: Other account status
Surveys
Shows the number of surveys assigned to the participant. Hover over the info icon for details.
Flags & codes
Displays participant flags and assigned codes in the format X + Y:
- First number: Number of flags assigned to the participant
- Second number: Number of codes assigned to the participant
- Hover over the info icon to view specific flags and codes
Messages
The number of messages sent to or scheduled for the participant. Hover over the info icon for message details.
Filtering and Sorting
Filter
Click the "Filter" button at the top of the table to open the filter dialog. The filter dialog provides two options:
Simple Filter
Use predefined filter types to quickly filter participants:
- Study Status: Filter by participant account status (Active, Deleted, Temporary)
- Participant ID: Search for specific participant IDs
- Participant Flags: Filter by assigned participant flags
- Linking Codes: Filter by linking codes assigned to participants
- Survey Key: Filter by specific survey keys
- Joined: Filter by participant join date
- Last Submission: Filter by date of last survey submission
Only one filter can be applied at a time. To combine multiple filters, use the Custom JSON tab.
After selecting a filter type and configuring the criteria, click "Apply" to filter the table. Use "Clear Filter" to remove the filter, or "Cancel" to close the dialog without applying changes.
Custom JSON
For advanced filtering, switch to the "Custom JSON" tab to write custom filter queries in JSON format. This allows for more complex filtering logic and combination of multiple filter criteria.
Sort
Click the sort icon (arrows with 0 and 1) next to the filter button to sort the table. The sorting applies to the most recent joined entry and can be toggled between:
- Ascending: Oldest joined entries first
- Descending: Newest joined entries first
Pagination
Use the pagination controls at the bottom of the table to navigate through pages.
Participant Details
Click on any participant row in the table to open the "Participant details" panel. This panel displays comprehensive information about the selected participant:
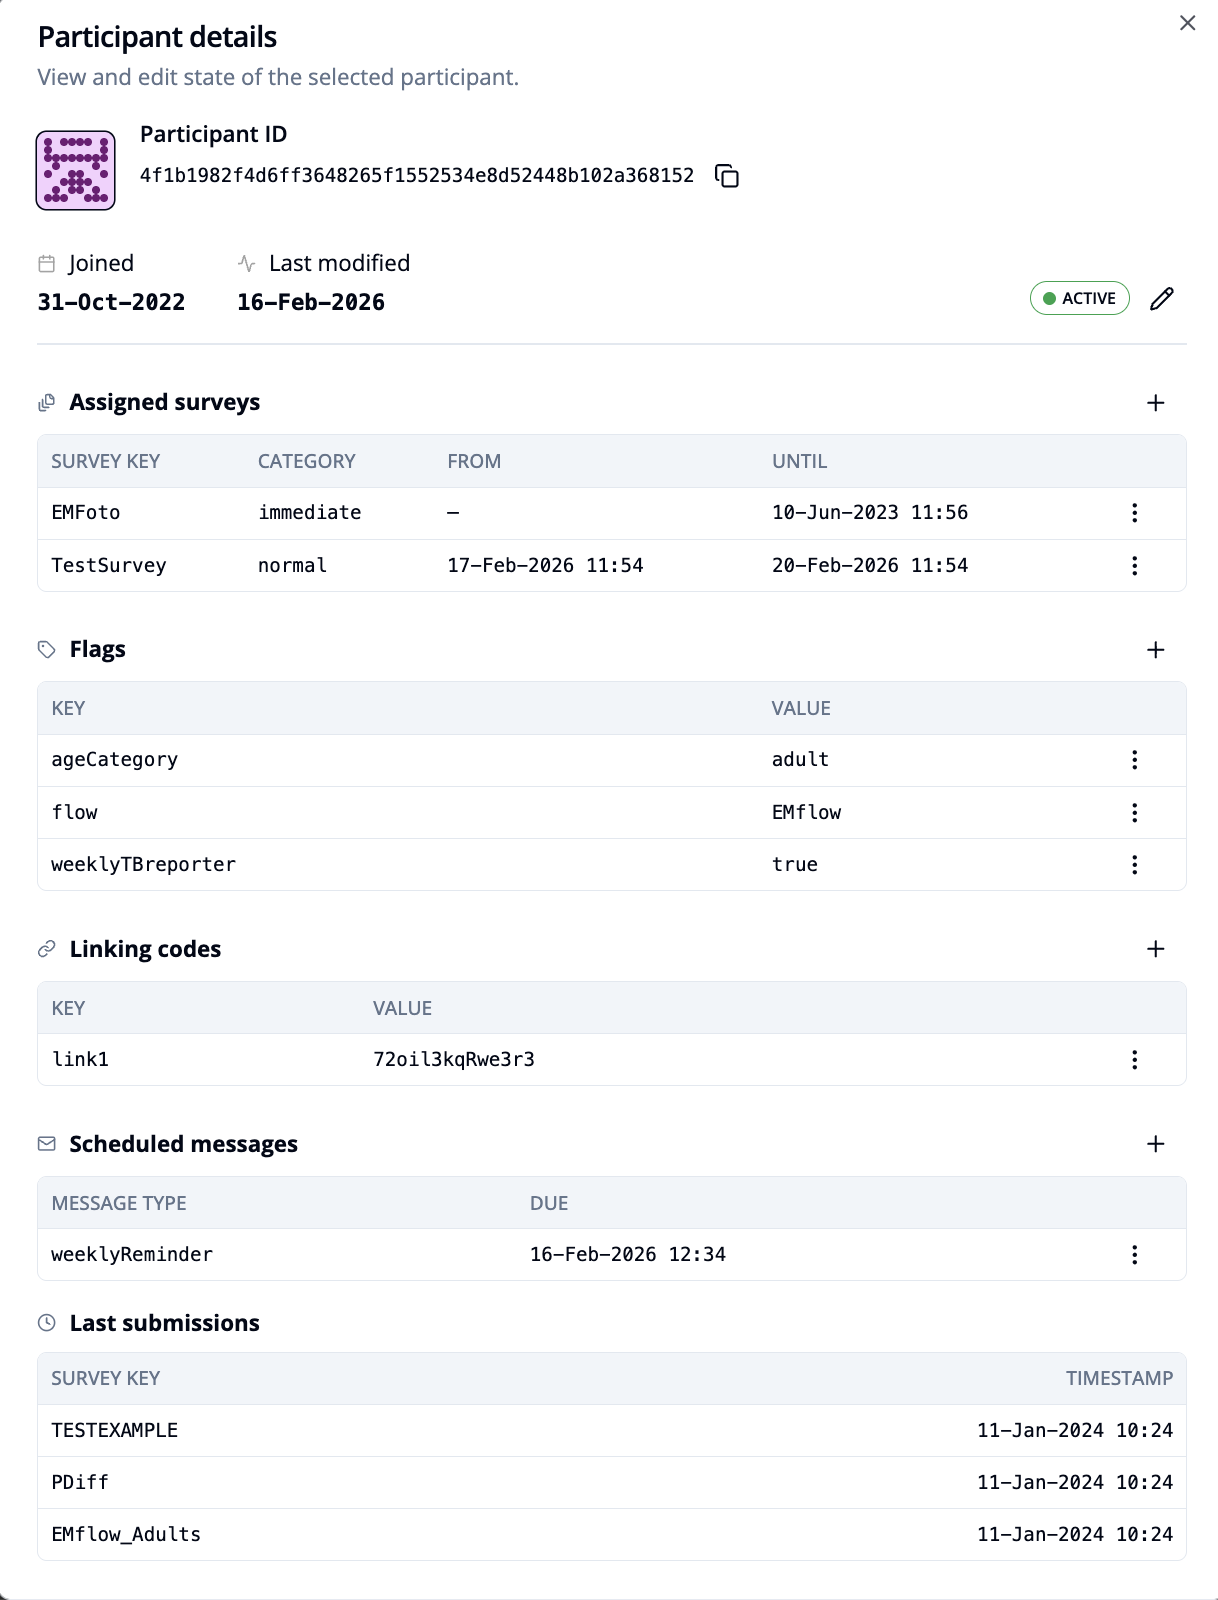
Participant ID
- The participant's unique identifier with avatar icon
- Click the copy icon to copy the ID to your clipboard
Joined and Last modified
- Joined: Date when the participant joined the study
- Last modified: Date of the participant's last activity
- Status: Current account status (Active, Deleted, Temporary, etc.)
Editing participant status
Click the pencil icon next to the status to change the participant's account status.
Assigned surveys
View all surveys currently assigned to the participant:
- Survey Key: Identifier of the assigned survey
- Category: Survey category (e.g., immediate)
- From: Start date for survey availability
- Until: End date for survey availability
Assigning a new survey
To assign a survey to the participant:
Click the + button in the "Assigned surveys" section
The "Add assignment" dialog will open
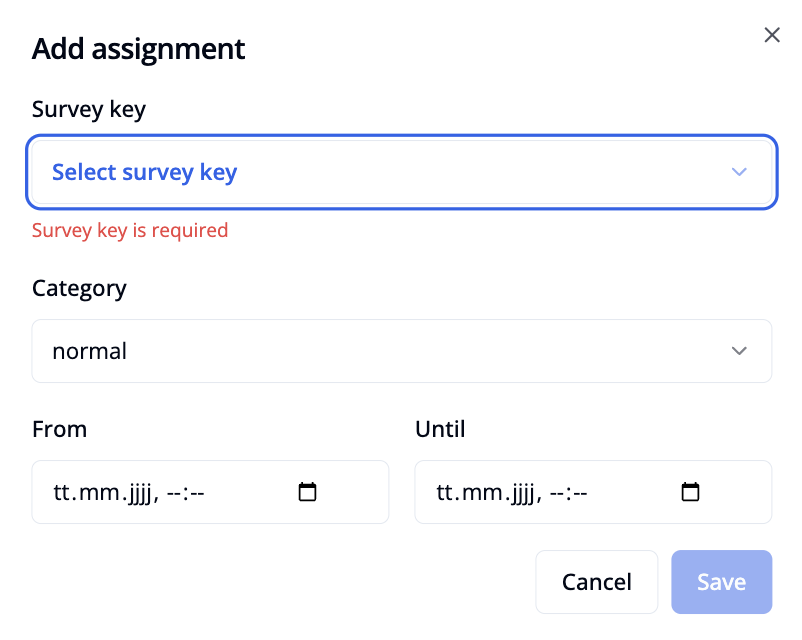
Configure the survey assignment:
- Survey key: Select the survey from the dropdown (required)
- Category: Choose the survey category (e.g., normal, immediate)
- From: Set the start date and time for survey availability (optional)
- Until: Set the end date and time for survey availability (optional)
Click "Save" to assign the survey, or "Cancel" to close without saving
Editing or removing surveys
Click the three-dots menu icon next to a survey to:
- Edit: Modify the survey's parameters (category, from/until dates)
- Move up/Move down: Change the order of surveys in the list
- Remove: Delete the survey assignment
Flags
View and manage participant flags (key-value pairs):
- Key: Flag identifier (e.g., ageCategory, flow, weeklyTBreporter)
- Value: Flag value (e.g., adult, EMflow, true)
Managing flags
- Add flag: Click the
+button to create a new flag - Edit flag: Click the three-dots menu icon next to a flag to modify its key or value
- Delete flag: Click the three-dots menu icon and select delete to remove a flag
Linking codes
View and manage linking codes (key-value pairs):
- Key: Linking code identifier
- Value: Linking code value
Managing linking codes
- Add linking code: Click the
+button to create a new linking code - Edit linking code: Click the three-dots menu icon next to a linking code to modify its value
- Delete linking code: Click the three-dots menu icon and select delete to remove a linking code
Scheduled messages
View all scheduled messages for the participant:
- Message Type: Type of the scheduled message
- Due: Date and time when the message is scheduled to be sent
Managing scheduled messages
- Add message: Click the
+button to schedule a new message. In the dialog, specify:- Message type: Select the type of message to send
- Scheduled for: Set the date and time when the message should be sent
- Edit message: Click the three-dots menu icon next to a message to modify its parameters
- Delete message: Click the three-dots menu icon and select delete to remove a scheduled message
Last submissions
View the participant's recent survey submissions:
- Survey Key: Identifier of the submitted survey
- Timestamp: Date and time of submission
Close the panel by clicking the X button in the top-right corner.
Exporting Participant Data
Click the Open Exporter button in the top-right corner to export participant data. This opens the "Export Participants" page where you can prepare a JSON file with all participants matching your query.
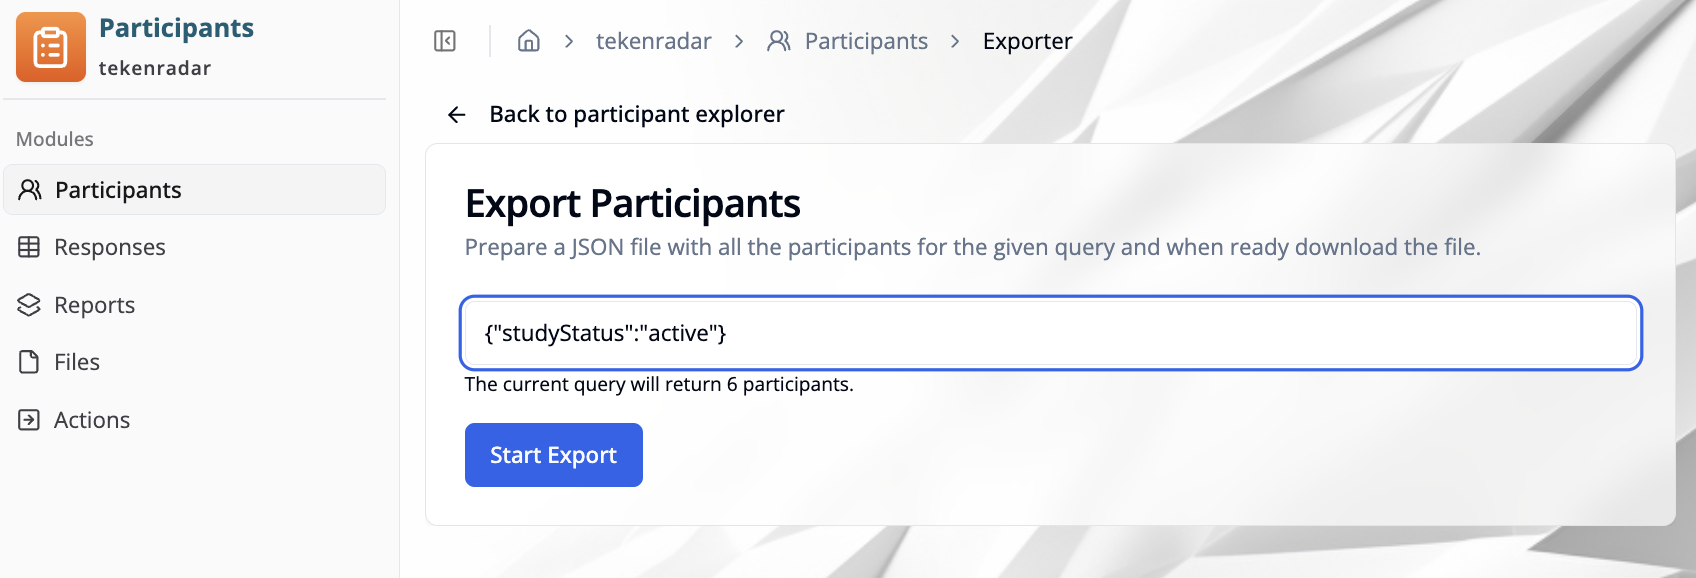
Using the Exporter
The exporter page shows:
- Search field: Enter filter criteria in JSON format to specify which participants to export (e.g.:
{"studyStatus":"active"}) - Current query preview: Displays how many participants match your query before you start the export.
Start Exportbutton: Click to begin the export process. The exported data will be downloaded as a JSON file.